
Pork Belly Burnt Ends Over Open Fire
Share
Pork belly burnt ends have a reputation for being complicated. They're not. People overthink the technique, chase elaborate setups, and end up somewhere between a braise and a disappointment. The truth is this: good pork belly, a solid dry rub, a proper fire, and patience. That's the whole thing.
What open fire gives you that nothing else does is direct, intense heat that properly renders the fat. Not steamed. Not slow-roasted. Renders it. That's the textural moment that makes burnt ends what they are; sticky glaze on the outside, a proper bite through the middle, fat that's done its job and got out the way. Gas can get you close with a closed lid and a longer cook, but it's not the same thing. It never quite is.
This recipe uses the cubed method: pork belly cut into bite-sized pieces, rubbed, cooked low and slow over glowing coals, then glazed hard at the end.
Why Open Fire Makes Better Burnt Ends
Most burnt ends recipes were written for smokers and adapted; sometimes badly for everything else. The reason smokers work well is that they give consistent low heat over a long time. Open fire, done properly, does the same job and then some.
The key is cooking over coals, not flame. Once your fire has burned down to a glowing bed of embers, you have radiant heat that's steady, penetrating, and genuinely hot without the aggressive flare-ups that char the outside before the inside is done. Budget 45 to 60 minutes from lighting to cooking-ready. Don't rush it… a fire that's ready is the difference between a great cook and a frustrating one.
The other thing open fire does is add flavour. Use seasoned hardwood: oak, ash, or beech are all widely available in the UK and all work brilliantly. The smoke becomes an ingredient rather than a side effect. Add a piece of apple or cherry wood to your coal bed while the pork is cooking for a slightly sweeter, fruitier smoke. It pairs well with pork in a way that heavier woods like hickory sometimes don't.
Shameless product plug: The Fire Maestro Backyard Pro's double-wall reburn system burns hotter and cleaner than a standard fire pit, which means you reach a solid coal bed faster and with less tending. Less faff, better fire.
What You Need
The Fire Pit
The Backyard Pro Smokeless Fire Pit is the base of this cook. Its double-wall airflow system superheats incoming air and reburns smoke particles near the rim; the result is a hotter, cleaner fire with significantly less smoke than a standard pit. That matters when you're cooking for two hours in a garden with neighbours.
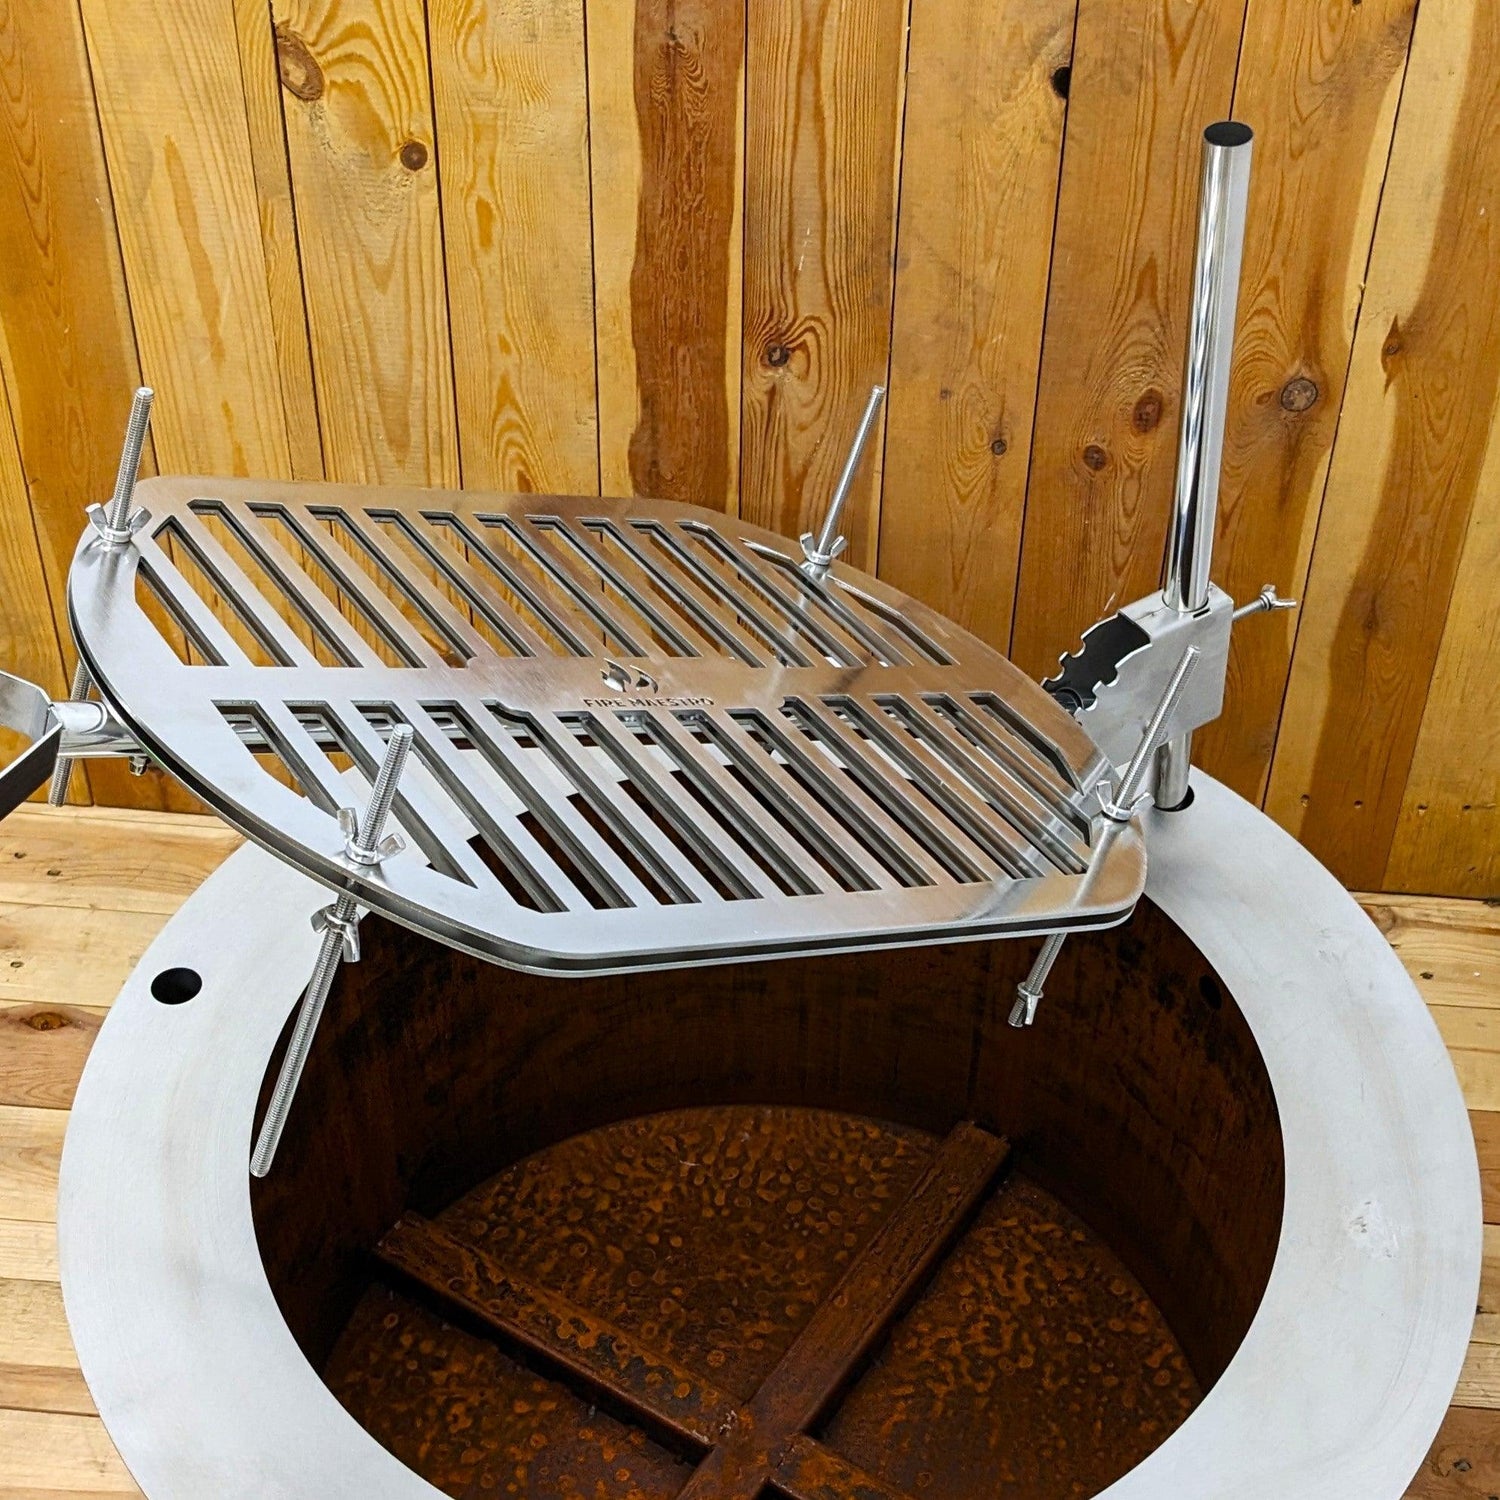
The Grill
For the cubed method, the Maestro Swivel Grill is ideal. Being able to rotate the food off the heat instantly gives you control that a fixed grill simply doesn't. When the glaze goes on and the sugars start to catch, you want to be able to pull the pork back in a second rather than scrambling with tongs. The swivel also makes it easy to manage different pieces at different stages (useful when cube sizes vary slightly and some are cooking faster than others).
Other Kit
• A good meat thermometer - essential, not optional
• Long-handled tongs
• A basting brush for the glaze
• A mixing bowl for the dry rub
• Foil if you want to rest the pork before glazing (optional but recommended)
Ingredients
For the Pork
- 900g skin-off pork belly (roughly 2 lbs - ask your butcher for skin-off, or remove it yourself before cubing)
- 1 tbsp fine sea salt
- 1 tsp flaked sea salt for finishing (optional)
For the Dry Rub
- 60g soft dark brown sugar
- 30g smoked paprika
- 20g fine sea salt
- 1 tbsp garlic granules
- 1 tbsp onion granules
- 1 tsp freshly ground black pepper
- ½ tsp cayenne pepper (optional - add if you want heat)
For the Glaze
- 120ml tomato ketchup
- 2 tbsp apple cider vinegar
- 2 tbsp soft dark brown sugar
- 1 tbsp Worcestershire sauce
- 1 tsp smoked paprika
- ½ tsp garlic granules
- Salt and black pepper to taste
Mix the glaze ingredients in a small saucepan and simmer over low heat for 5 minutes until slightly thickened. It should be tangy, a little sweet, with a gentle smoky backbone. Adjust with vinegar if it needs more sharpness, or sugar if it needs rounding out. This is a classic American BBQ base, and it works because it's balanced rather than sweet-dominant. The pork is rich enough; the glaze should cut through it, not pile on.
Method - Step by step guide
Step 1 - Prep the Pork
Cut the pork belly into even cubes, roughly 3–4cm. Even sizing matters here - if some pieces are significantly smaller, they'll overcook before the larger pieces are ready. Remove any large pockets of fat that won't render in the cook time, but don't trim obsessively. You need fat to make burnt ends work.
Pat the cubes dry with kitchen paper before applying the rub. Moisture is the enemy of crust.
Step 2 - Apply the Dry Rub
Mix all the rub ingredients in a bowl. Coat each cube thoroughly - press the rub in rather than just dusting it on. You want proper coverage on every face.
At this point you have a choice: cook immediately, or leave the rubbed pork covered in the fridge for up to 24 hours. The longer rest makes a noticeable difference. The rub penetrates deeper, the surface dries out slightly (which helps the bark form), and the overall flavour is more developed. If you have the time, do it the day before.
Step 3 - Build the Fire
Light your Backyard Pro and let the fire build properly. You're aiming for a solid, glowing bed of coals with minimal active flame before you start cooking. This takes around 45–60 minutes depending on the wood and conditions.
The double-wall reburn system means the Backyard Pro runs hotter than most pits, so your coals will be ready faster than you might expect. Once you have a good coal bed, add your cooking wood if you're using it - a small piece of apple or cherry wood placed at the edge of the coals will give you a gentle, consistent smoke throughout the cook without overwhelming the pork.
Step 4 - Cook Low and Slow
Place the pork belly cubes on the Swivel Grill set at a height that gives you moderate, indirect heat - not directly over the hottest part of the coals. You want the pork to cook through gently over 1.5 to 2 hours, not char quickly on the outside while the inside stays raw.
Turn the cubes every 20 to 30 minutes. Use the swivel to rotate pieces off the direct heat if any are colouring too fast. You're looking for a dark, set bark on the outside and an internal temperature of around 88–95°C - at this point the collagen has broken down and the fat has rendered properly. Below 85°C the texture will be chewy rather than yielding. A meat thermometer is the only way to know for certain.
Don't be alarmed if the cubes look quite dark before the glaze goes on. That's the bark forming, and it's exactly what you want.
Step 5 - Glaze and Finish
Once the pork has reached temperature and the bark is set, it's time to glaze. Stoke the fire slightly to raise the heat… you want more active heat for this stage.
Brush each cube generously with the BBQ glaze. Use the swivel to keep the pieces over medium-high heat, turning frequently. The sugars in the glaze will caramelise quickly - this is the 'burnt' in burnt ends. You want them to catch and colour, not burn black. Watch them closely. Two or three turns over 8 to 10 minutes should give you a deep, sticky, slightly charred glaze.
Remove from the heat and rest for 5 minutes before serving. Skewer each cube with a cocktail stick and serve straight from the board.
Tips and Variations
-
Prep a day ahead: rub the pork and leave it uncovered in the fridge overnight. The surface dries out slightly, which gives you a better bark.
-
Don't skip the thermometer: Visual cues are useful but internal temperature is the only reliable measure. 88–95°C is your target range.
-
Two-zone your coals if needed: if some pieces are cooking faster than others, build your coal bed slightly off-centre and use the cooler side to slow things down.
-
The glaze is a starting point: Swap the apple cider vinegar for bourbon, add a teaspoon of chipotle paste for heat, or use a dark treacle instead of brown sugar for something deeper and less sweet.
-
Fruitwoods are brilliant with pork: Apple and cherry are both easy to source in the UK and add a sweet, mild smoke. Oak and ash give a more neutral, slightly earthy smoke if you prefer less flavour complexity.
- Leftovers: if there are any, reheat beautifully over a low fire with a fresh brush of glaze. They're arguably better the next day.
Frequently Asked Questions
Can I make pork belly burnt ends on a gas BBQ?
You can, but the result is different. Gas struggles to reach the sustained, direct heat that properly renders the fat - you'll typically need to close the lid and cook longer to compensate. The other thing you lose is smoke. Gas adds no flavour of its own, so the seasoning and glaze do all the work. Over open fire, the wood smoke becomes a third flavour layer. The difference is real and it's worth experiencing.
What's the best cut of pork belly for burnt ends?
Look for a piece with a good fat-to-meat ratio - roughly 50/50. If the belly is too lean, the fat won't render properly and the texture will be dry rather than sticky. Skin-off is preferable; ask your butcher if it's not already removed. Even thickness across the slab makes cubing easier and helps everything cook at the same rate.
Why are my burnt ends coming out dry?
Usually one of three things: the cubes were too small and overcooked quickly, the heat was too aggressive throughout, or the glaze went on too early before the interior was fully cooked. The dry rub phase does most of the work - give the pork the full low-and-slow time before glazing. Once the BBQ sauce goes on, the sugars catch fast over high heat, so that final stage needs attention.
Do I need a smoker to make burnt ends?
No. A smoker gives you passive smoke over a long cook, but an open fire with seasoned hardwood achieves the same result with more control. The key is cooking over coals rather than active flame - steady, radiant heat rather than direct fire. If you want more smoke flavour, add a piece of apple or cherry wood to your coal bed during the cook.
How do I control the temperature when cooking over a fire pit?
Grill height is your main control. The Swivel Grill makes this straightforward - raise it for less heat, lower it for more, and swing food off the direct heat entirely when you need to slow things down. For the low-and-slow phase of this cook, you want the grill set higher than you might expect. If pieces are colouring too fast before they've reached temperature, move them to the edge of the coal bed and let the residual heat finish them.
Can I prepare pork belly burnt ends in advance?
Yes, and they're genuinely better for it. Apply the dry rub up to 24 hours ahead and leave the cubes uncovered in the fridge - the surface dries out slightly and the rub penetrates deeper. You can also cook the pork through completely, cool it, and reheat on the grill with a fresh application of glaze. They hold well and the texture doesn't suffer.
What internal temperature should pork belly burnt ends reach?
You're aiming for 88–95°C. At this temperature the collagen has broken down, the fat has rendered, and the texture is yielding rather than chewy. At 65°C the pork is technically safe to eat, but it won't have the right texture for burnt ends. Use a meat thermometer and check a few pieces - internal temperatures can vary across the grill.
What wood works best for cooking pork over an open fire?
Fruitwoods - apple and cherry in particular - pair beautifully with pork. They produce a mild, slightly sweet smoke that complements the richness of the belly without overpowering it. In the UK, seasoned oak and ash are widely available and both work well for a more neutral smoke. Avoid softwoods like pine or spruce, and never burn treated or painted wood. The wood is an ingredient - it affects the flavour of everything you cook over it.
How many people does this recipe serve?
The recipe as written serves 4 as a starter or sharing plate, or 2 as a generous main alongside sides. Pork belly loses roughly 25–30% of its weight as the fat renders during cooking. If you're cooking for a crowd, scale up proportionally and add 20–30 minutes to the low-and-slow phase for larger batches.
What's the difference between the cubed method and cooking the pork belly whole?
The cubed method gives you more surface area, which means more bark and more glaze coverage per piece - it's the traditional burnt ends approach and what this recipe is built around. Cooking the belly whole and slicing before glazing gives you a more controlled cook with less risk of individual pieces drying out, and works well over an Asado grill where you want a slower, more even heat. Both are good. The cubed method is the bolder, stickier, more crowd-pleasing result.
Cook It Yourself
Pork belly burnt ends are the kind of recipe that becomes a permanent fixture once you've made them. They look impressive, they feed a crowd, and the technique is genuinely simple once you've done it once.
If you don't have a fire pit yet, the Backyard Pro was built for exactly this kind of cook… long, low, flavour-driven fire cooking in a UK garden. Pair it with the Swivel Grill and you have a setup that handles everything from a quick weeknight cook to a five-hour slow session.


